

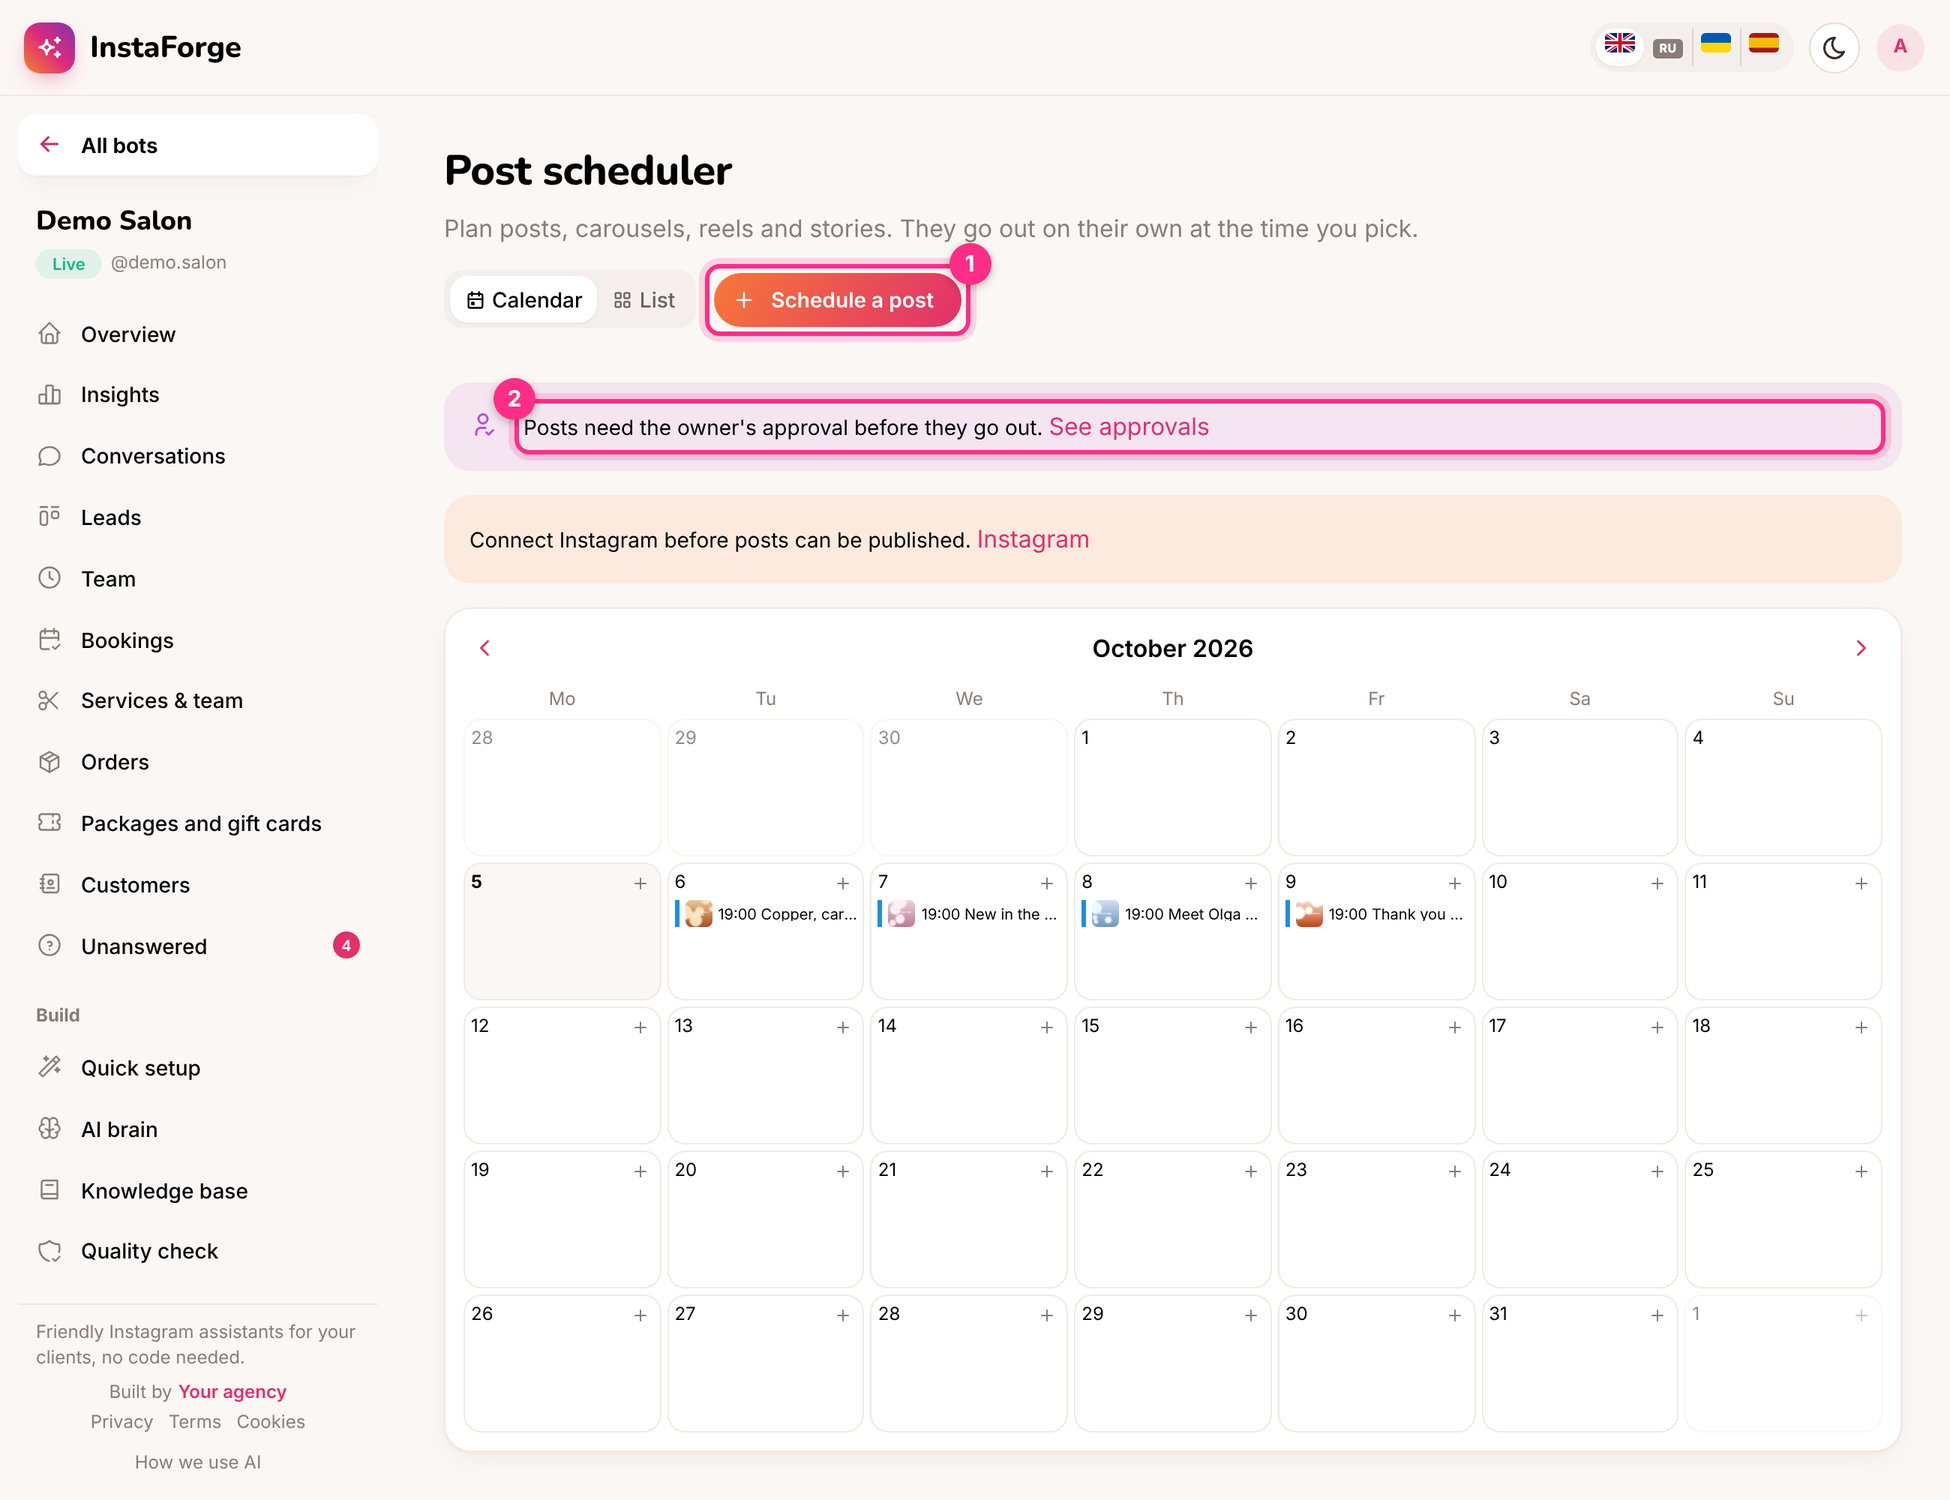
The scheduler: schedule a post (1) and the approval notice (2)
Schedule a post
1
Click Schedule a post (1)
Choose the type: photo, carousel, reel or story.
2
Add the media and the caption
Upload photos or a video. Write caption drafts one in the business’s tone, with hashtags.
3
Pick the date and time
In the business’s time zone. The content planner suggests the times that worked best.
The Instagram account must be connected for posts to go out. Until then you can still plan and get them approved.
Post approval
When the business owner wants to see posts before they go out, turn on Posts need the owner’s approval on the Post approval page.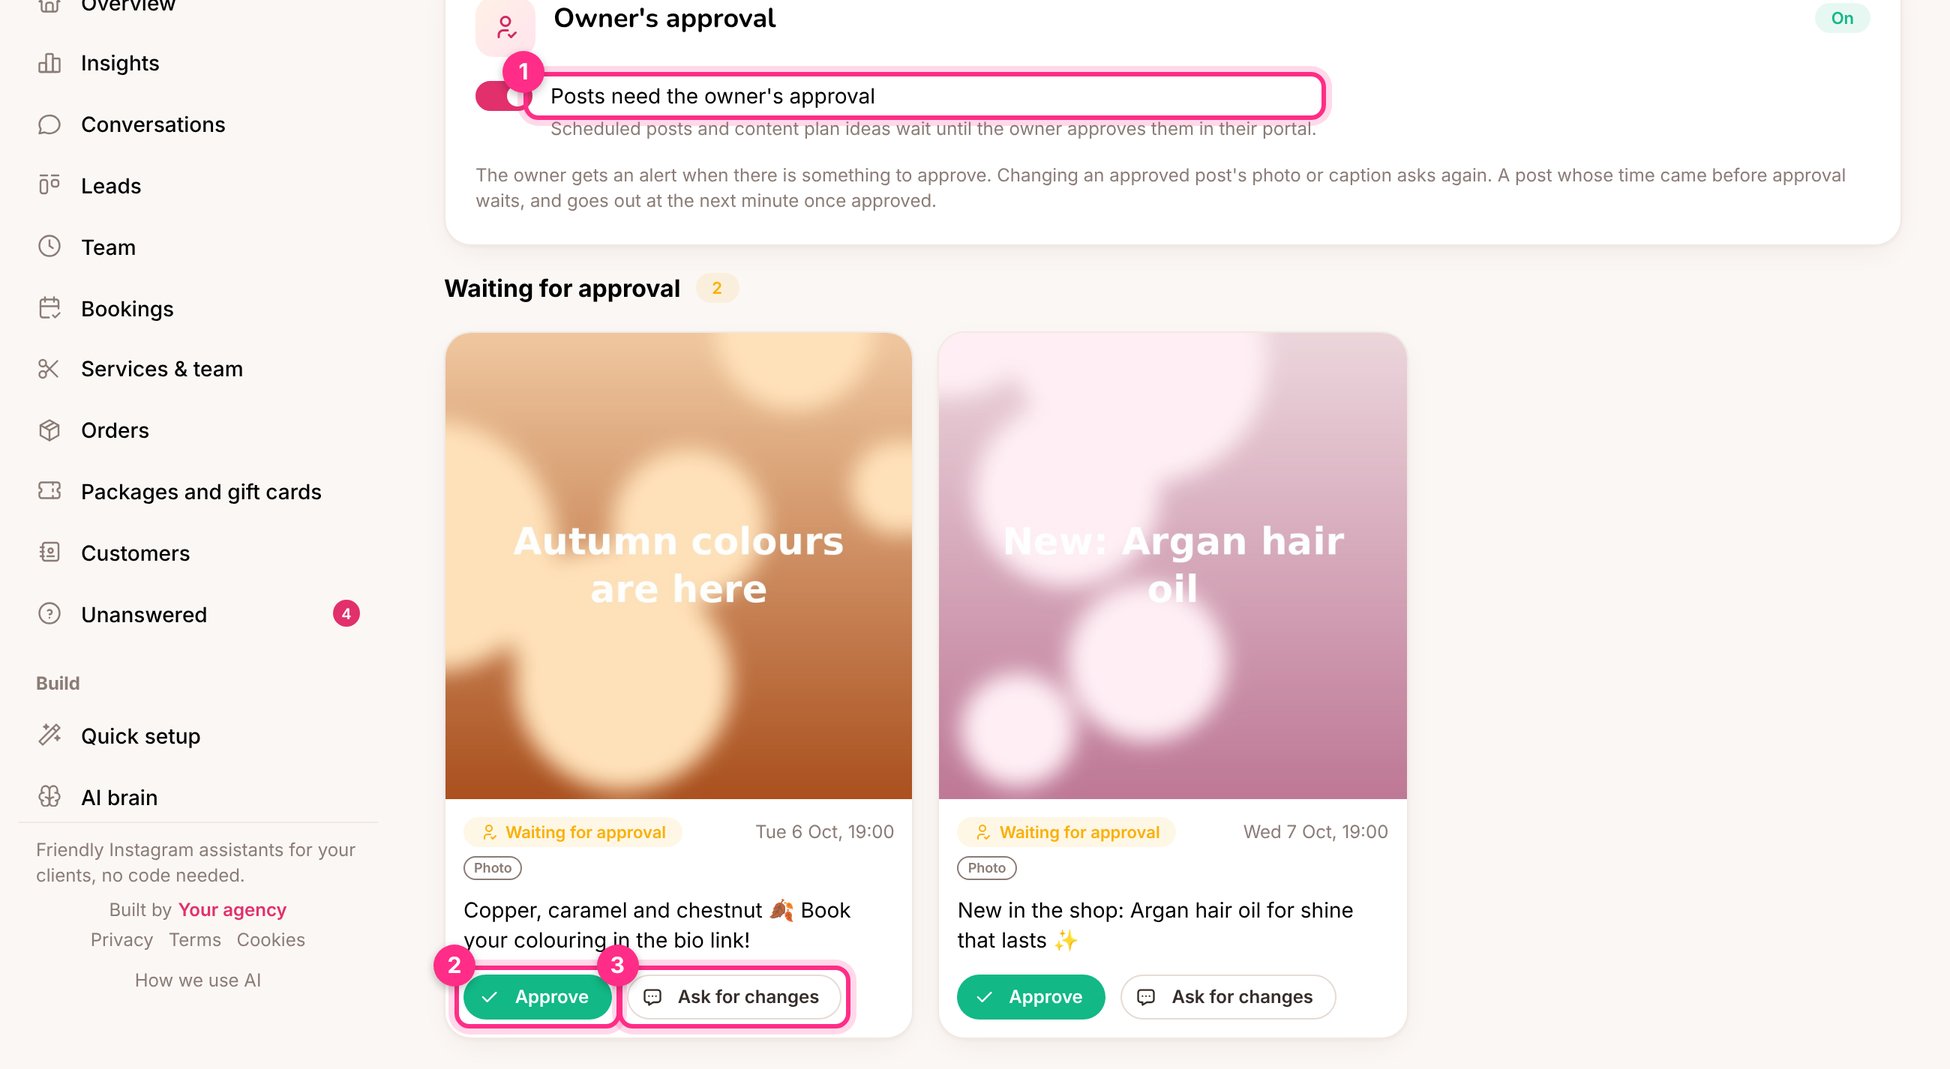
Post approval: the setting (1), approve (2) or ask for changes (3)
1
You schedule the post as usual
It’s marked Waiting for approval.
2
The owner gets an alert
They open Approve posts in their portal and click Approve, or Ask for changes with a note (“Please use the new photo of Olga”).
3
You're told
You get an alert either way. Change the post and it goes back for approval.