> ## Documentation Index
> Fetch the complete documentation index at: https://docs.instaforge.app/llms.txt
> Use this file to discover all available pages before exploring further.
# Custom domains
> Give a client their own address, like portal.their-site.com, for their portal, website chat, booking page and shop.
A client can have their own address for everything their customers and their team see: the sign-in page, their portal, the website chat, the booking page and the shop. On portal.demo-salon.com the business owner sees their own name and logo, and their customers never see the platform's address.
Admins manage domains on the **Domains** page in the main menu.
 ## Add a domain
Use a subdomain of their website, like **portal.their-site.com** or **book.their-site.com**. A bare domain (their-site.com) only works if their DNS provider allows a CNAME at the root, often called CNAME flattening or ALIAS.
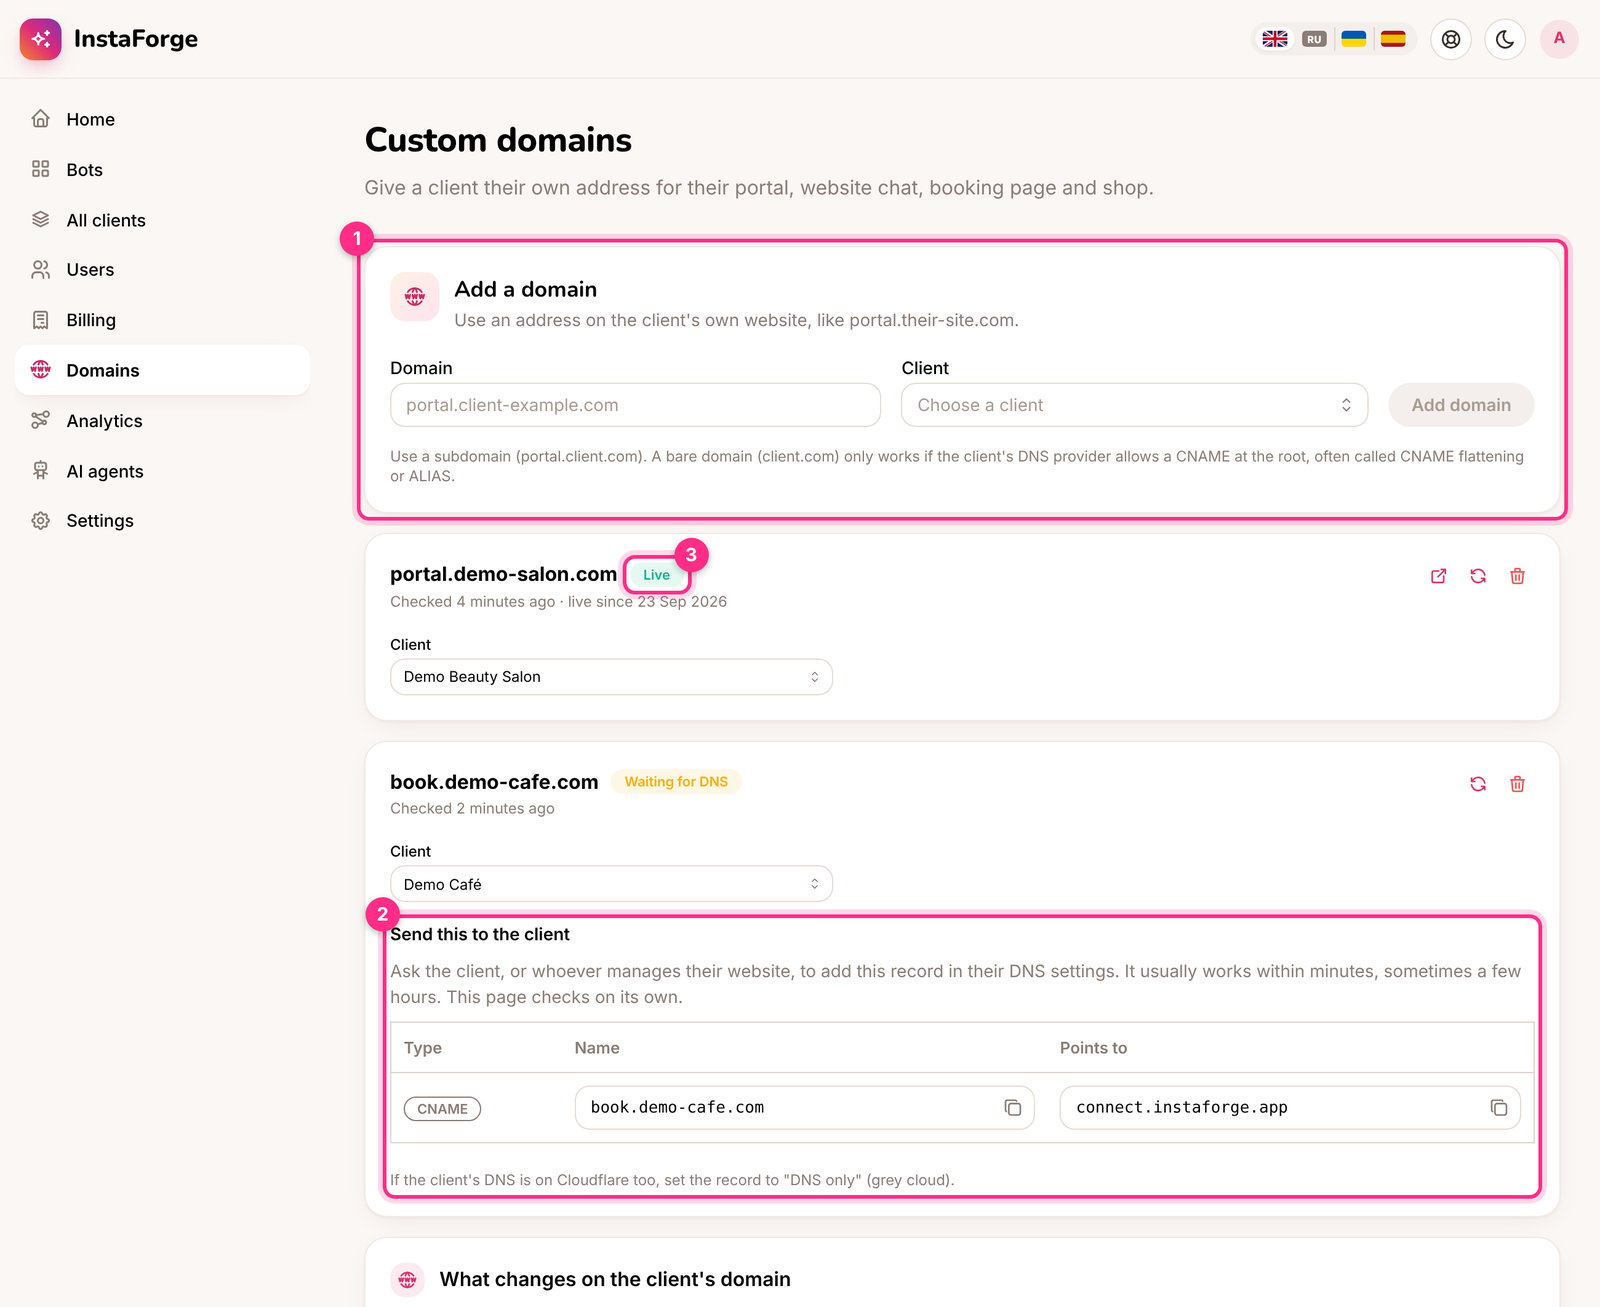
Type the address, pick the client and click **Add domain** (1). The domain appears with the status **Waiting for DNS**.
Under **Send this to the client** (2) there's one record with copy buttons: a **CNAME** with the client's address as the name, pointing to **connect.instaforge.app**. The client, or whoever manages their website, adds it in their DNS settings.
The page checks on its own. Once the record is found the status changes to **Getting certificate**, and a few minutes later to **Live** (3). Click the refresh button to check straight away.
If the client's DNS is on Cloudflare too, the record must be set to **DNS only** (the grey cloud), not proxied.
## What changes on the client's domain
| Where | On the client's domain |
| - | - |
| Sign-in page and portal | The client's name and logo instead of yours |
| Website chat | The chat link and the code for their website use their address |
| Booking page and shop | Live on their address |
| Links the assistant sends | Booking, shop, payment and bring-a-friend links use their address |
| Emails to the business owner | Invitations, password resets and alerts link to their address |
## Add a domain
Use a subdomain of their website, like **portal.their-site.com** or **book.their-site.com**. A bare domain (their-site.com) only works if their DNS provider allows a CNAME at the root, often called CNAME flattening or ALIAS.
Type the address, pick the client and click **Add domain** (1). The domain appears with the status **Waiting for DNS**.
Under **Send this to the client** (2) there's one record with copy buttons: a **CNAME** with the client's address as the name, pointing to **connect.instaforge.app**. The client, or whoever manages their website, adds it in their DNS settings.
The page checks on its own. Once the record is found the status changes to **Getting certificate**, and a few minutes later to **Live** (3). Click the refresh button to check straight away.
If the client's DNS is on Cloudflare too, the record must be set to **DNS only** (the grey cloud), not proxied.
## What changes on the client's domain
| Where | On the client's domain |
| - | - |
| Sign-in page and portal | The client's name and logo instead of yours |
| Website chat | The chat link and the code for their website use their address |
| Booking page and shop | Live on their address |
| Links the assistant sends | Booking, shop, payment and bring-a-friend links use their address |
| Emails to the business owner | Invitations, password resets and alerts link to their address |
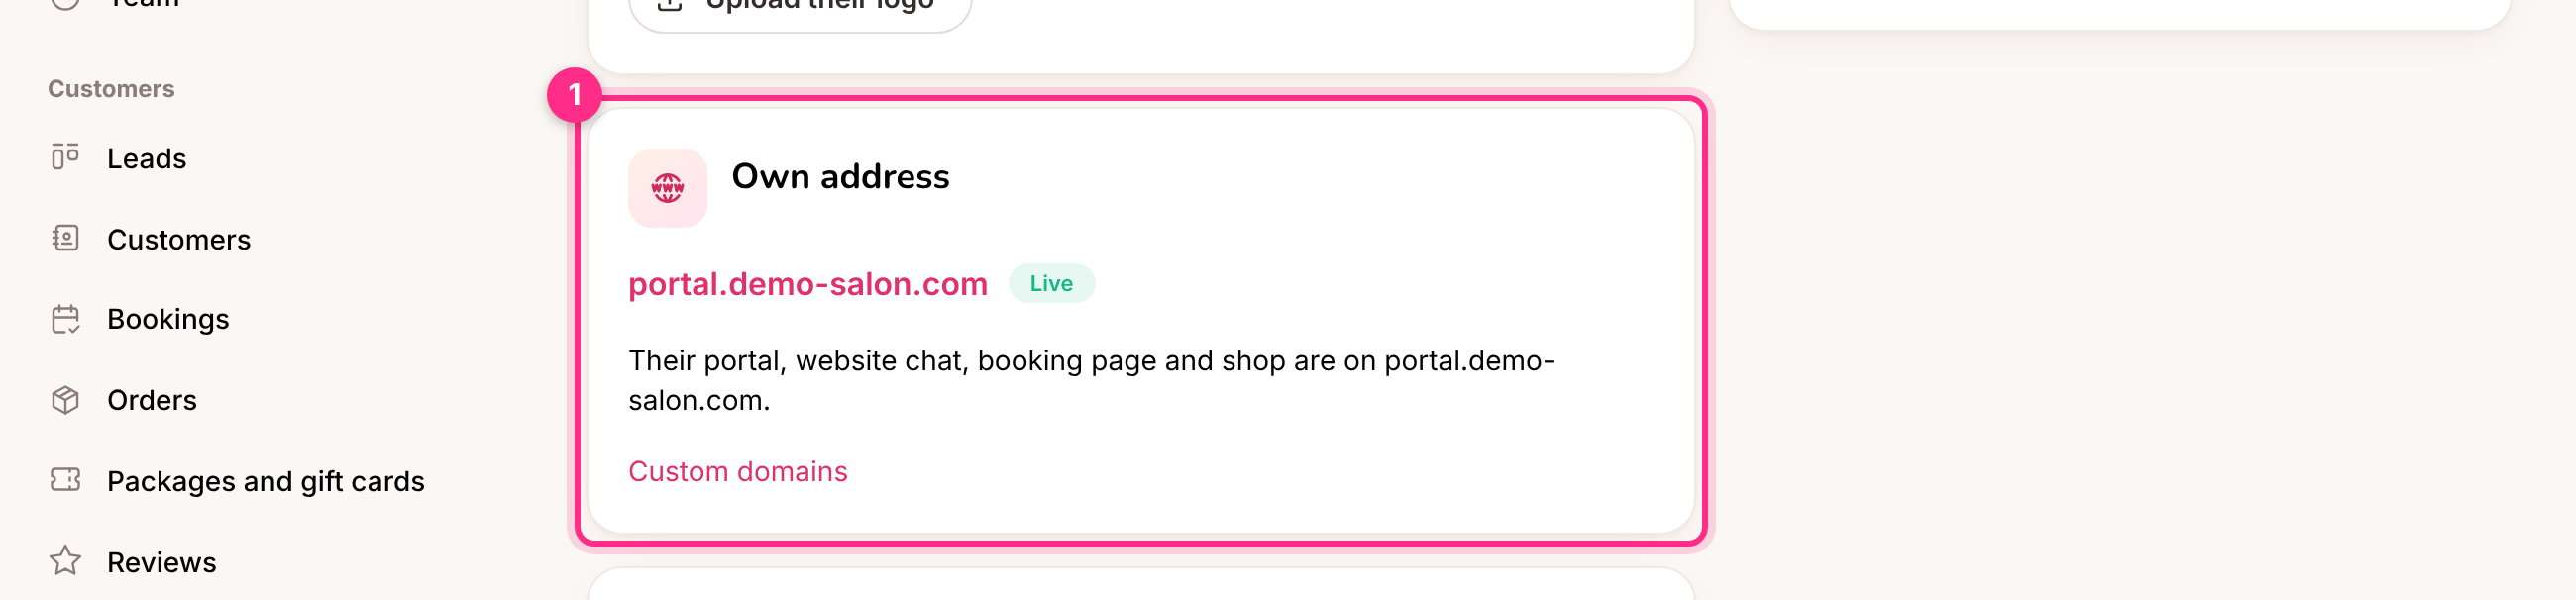
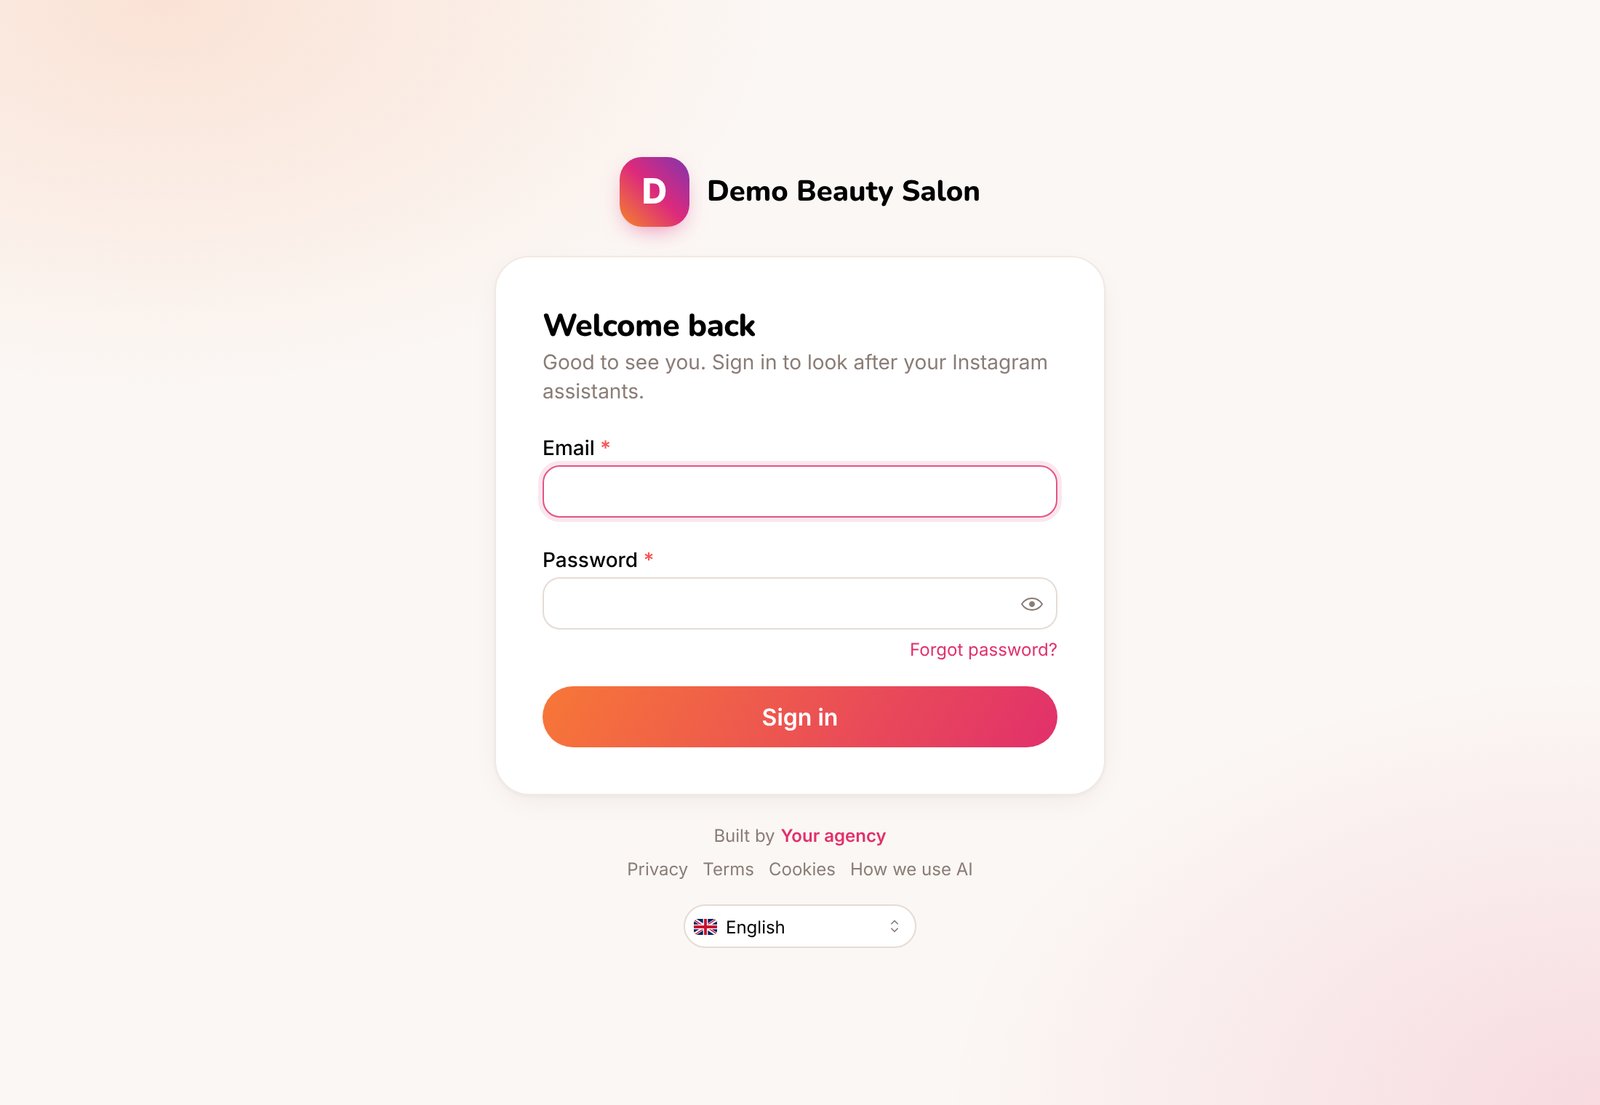 Without a logo the client's initial is shown. Upload their logo on the client's **Client portal** page, which also shows the client's address once it has one.
 ## Who can sign in there
On a client's domain, only that client's business owners and your own team can sign in. A business owner of another client gets a message to sign in on their own address. On the platform's own address everyone signs in as before.
## What stays on the platform's address
Connecting Instagram and signing in with Google always happen on the platform's own address, because Meta and Google only accept addresses registered with them in advance. This takes a second and the client doesn't need to do anything.
## Change or remove a domain
* **Move it to another client:** pick the client in the domain's **Client** field. Nothing changes in DNS.
* **Remove it:** click the bin. The address stops working and the client's links go back to the platform's address. The client can then delete their DNS record.
If you remove a domain, any website chat code on the client's website that uses the old address stops working. Copy the new code from the **Website chat** page and send it to the client.
Check the record with the client: the type must be CNAME, the name must be exactly the address you added, and it must point to connect.instaforge.app. Some DNS providers want only the first part as the name (portal instead of portal.their-site.com). If their DNS is on Cloudflare, the record must be DNS only.
The domain's card shows what Cloudflare reported. Most often the record was removed or points elsewhere. Fix the record and click the refresh button, or remove the domain and add it again.
No. The address is theirs, and the certificate is issued and renewed automatically.
This documentation is built and hosted on [Mintlify](https://mintlify.com), a developer documentation platform.
## Who can sign in there
On a client's domain, only that client's business owners and your own team can sign in. A business owner of another client gets a message to sign in on their own address. On the platform's own address everyone signs in as before.
## What stays on the platform's address
Connecting Instagram and signing in with Google always happen on the platform's own address, because Meta and Google only accept addresses registered with them in advance. This takes a second and the client doesn't need to do anything.
## Change or remove a domain
* **Move it to another client:** pick the client in the domain's **Client** field. Nothing changes in DNS.
* **Remove it:** click the bin. The address stops working and the client's links go back to the platform's address. The client can then delete their DNS record.
If you remove a domain, any website chat code on the client's website that uses the old address stops working. Copy the new code from the **Website chat** page and send it to the client.
Check the record with the client: the type must be CNAME, the name must be exactly the address you added, and it must point to connect.instaforge.app. Some DNS providers want only the first part as the name (portal instead of portal.their-site.com). If their DNS is on Cloudflare, the record must be DNS only.
The domain's card shows what Cloudflare reported. Most often the record was removed or points elsewhere. Fix the record and click the refresh button, or remove the domain and add it again.
No. The address is theirs, and the certificate is issued and renewed automatically.
This documentation is built and hosted on [Mintlify](https://mintlify.com), a developer documentation platform.